We said it was going to be our winter hobby... but like everything else this winter (cross-country skiing being another ::tear::) the time has passed us by and we just haven't been able to get everything done that we've wanted to. BUT we finally set a time to brew some beer.
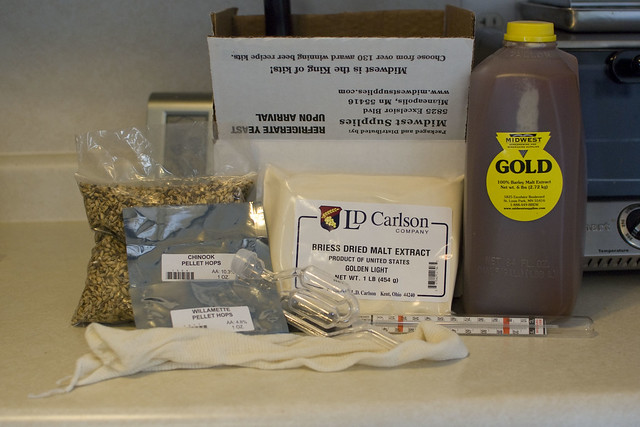
We went over to the local Midwest Brewing Supply store and picked out an ingredient box. They have MANY MANY different types of beer kits, making it easy - with everything you need right there. We decided to first try out a 'Copper Ale'.
An old friend of mine, Brandi - my first co-counselor at Camp Barnabas, now lives in Minneapolis. It so happens that her and her husband are beer brewing connoisseurs and offered to be of GREAT help and guide us along our first batch. So they came over for lunch and helped us learn about the exciting hobby of beer brewing. And boy are we grateful, as they taught us a lot of things the directions wouldn't have. And of course everyone was patient as I documented every-step-of-the-way :-D
Oh and the title of this blog actually comes from a few weekends ago when Kyle, Brandi, her husband, Sam, and I went to a local brewery to try their first growlers they were selling to the public. They had some mix up with late hops or something and were calling the beer 'Batch number one'. Hopefully there aren't any errors in our beer.
It was a multi-hour process... but not completely hands on for 5 hours. A lot of prepare-mix... wait, mix-dump-mix... wait. So we played a few games in between.
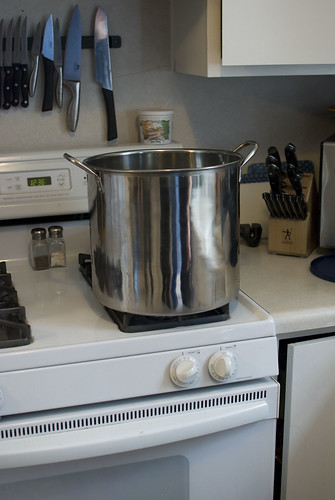
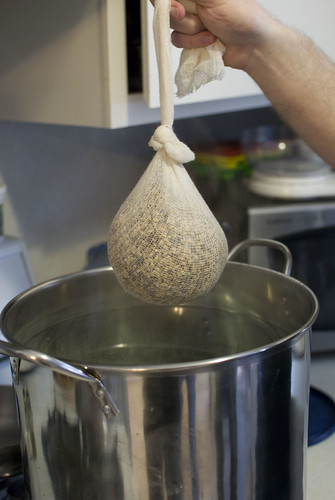
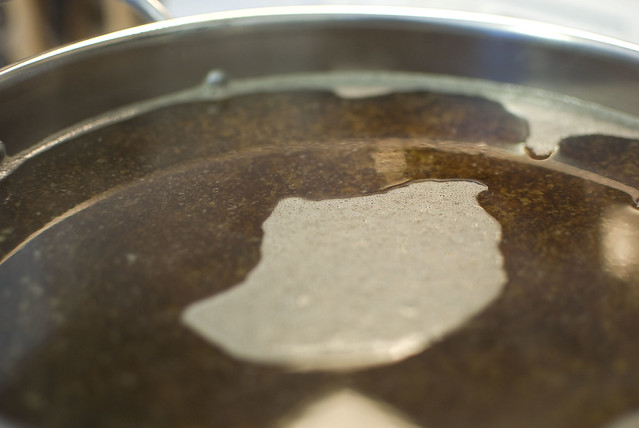
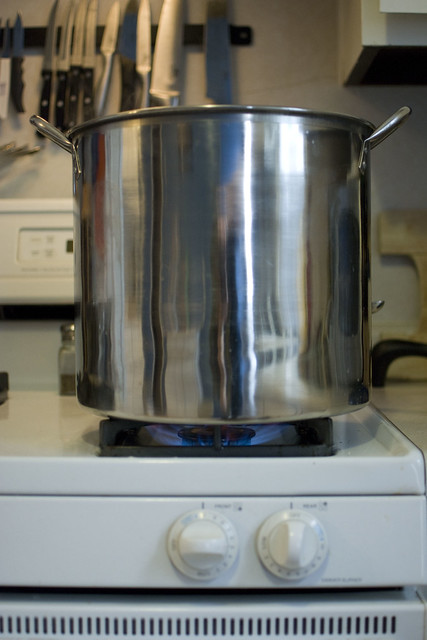
First step.... getting 5 gallons of water to boil.
Once the water was hot, we took the grains (malted barley) that came in our kit. Oh the guy helping us out at Midwest Supplies, crushed the grains for us in the store. Actually he showed us how to so we can do it ourselves next time. Using their machine beats breaking them up with a beer bottle at home! So we dumped the grains in this sock like thing to make sort of a tea bag, to steep in the pot.

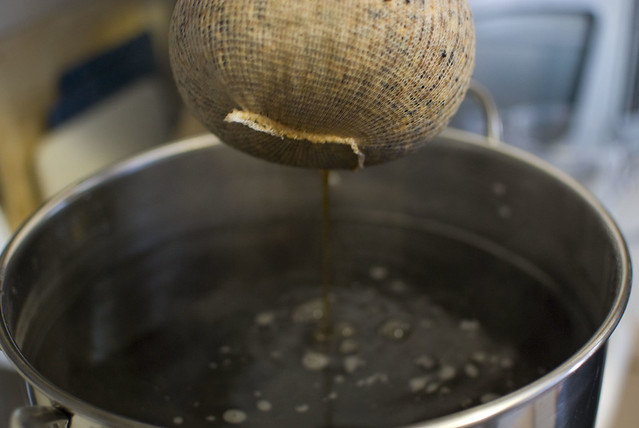
Then we set the timer and let the steeping begin. I can't remember exactly how long this was, but once the timer went off we came back to check the temperature and take the grains out.

Ahhhh look at this, now it has it's color. yum, yum.
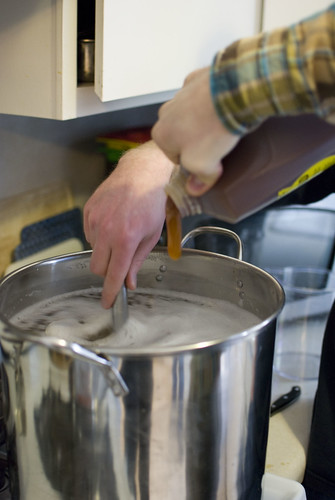
Next was time to add the powered malt extract and whisk that in, being careful there are no clumps.

I got the picture, then jumped in to help Kyle - we traded off pouring ever-so-slowly and whisking.
After the powered malt was mixed in, it was time to add the Barley malt Extract Syrup. Boy was this stuff thick!
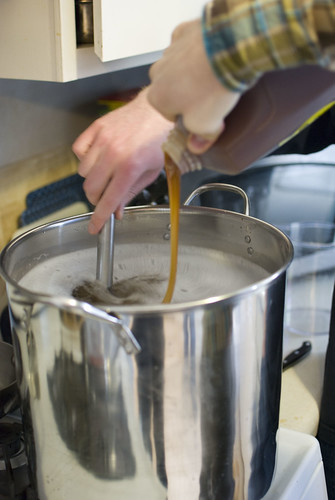
MMMmmmmm look at that color
The stage we were at here is called the Wort Stage, which means teh beer before the yeast (the non-alcohol beer). The grains turn into sugar, then when we add the yeast (the last step), the yeast will eat the sugar, thus making alcohol.
So we had to bring the water back to a boil.
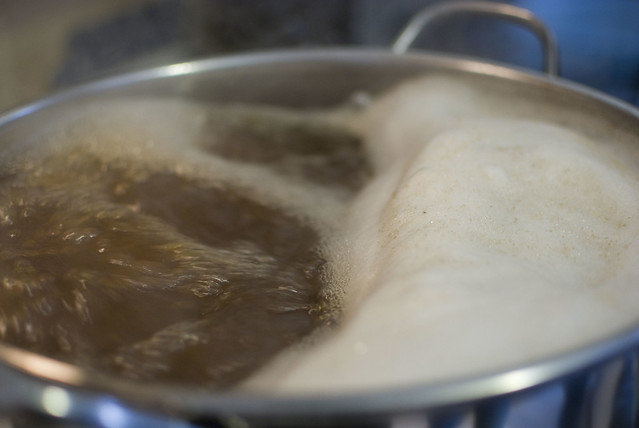
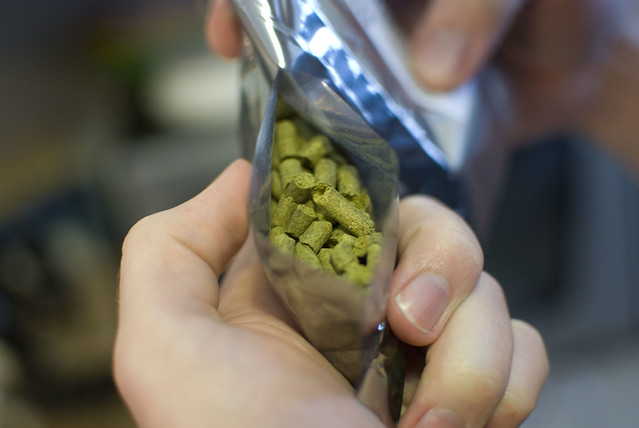
As you can see there's some foam that collected on the top, we scooped that out (which had some graining pieces in it) and removed that from the batch. Then it was time to add the hops. Sam instructed us to be careful when adding the hops, as he has caused the pot to boil over in the past. So we lowered the heat to avoid a boil over and carefully added the hops. Which look a bit like hamster food :-P
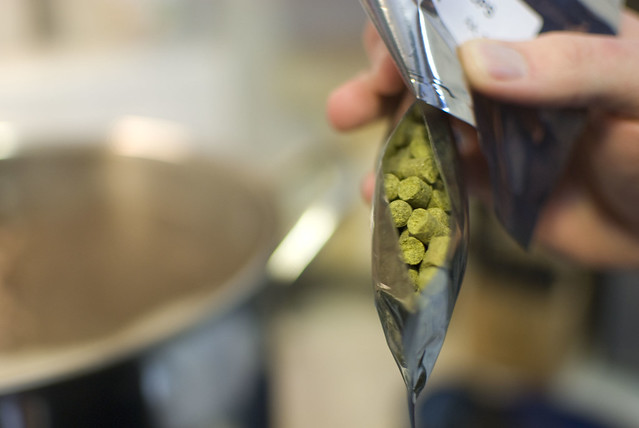
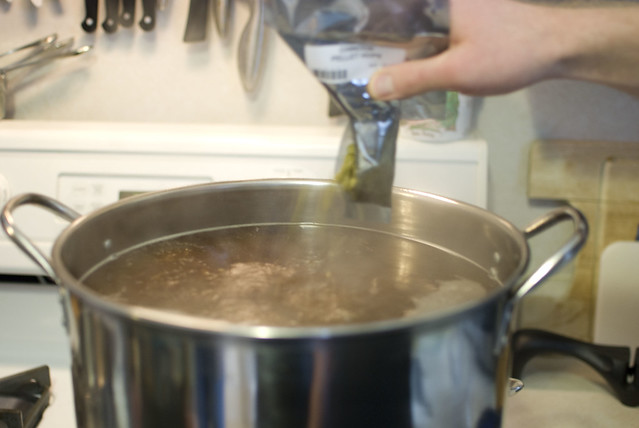
There are two hops in this recipe (sometimes 3), and after adding the first batch, we let the water boil for about an hour (45 minutes). The first addition of hops is called the bittering hops. Then 45 minutes later we added the second group of hops, which is called the flavoring hops. (if there were a third batch of hops, that would be called the aroma hops)
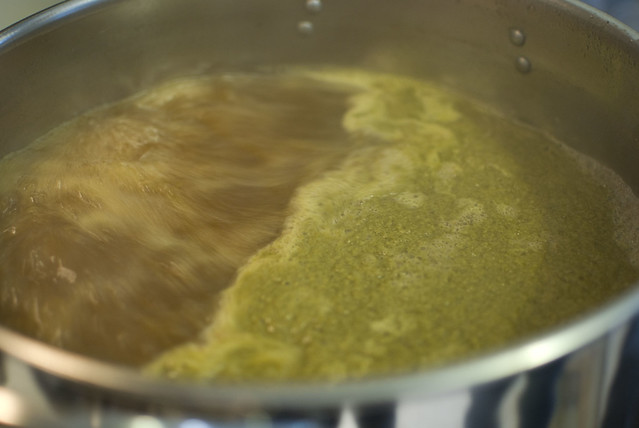
Now you can see that green slug that is forming on the top from the hops. The beer is starting to smell really good at this point (really good in my opinion). And you can also tell there's quite a bit of liquid that has boiled out. But that's okay because we'll be adding cold water here in a bit to make of the lost amount.
Next came the COOLING part. Now this is suppose to be done in a rather timely manner. Our friends brought over their copper coils (real name=wort chiller) this is a handy device that you hook up to cold water, (sterilize it, stay tuned) gets dropped in the beer and cold water is ran through the chiller to help it cool. We did not purchase one because they are rather expensive and Brandi said they'd bring their's over.... problem was we didn't have a faucet that has threads on it to hook the hose up to. But we learned that in winter, we have the next best thing SNOW! So we filled the sink with cold water.
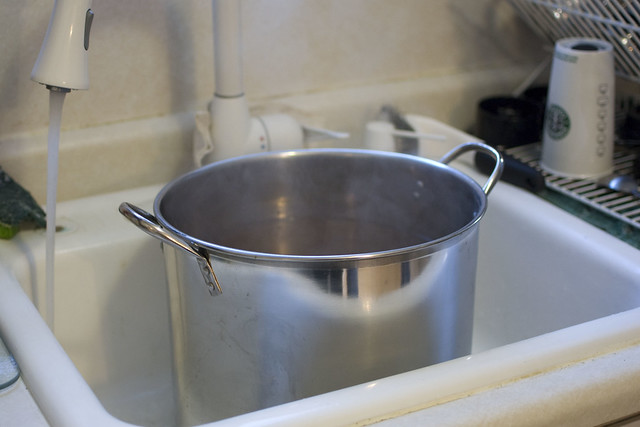
And added snow to the water to get it nice and cold (we only had the lid on the beer when we put the snow in to keep the snow out of the beer)
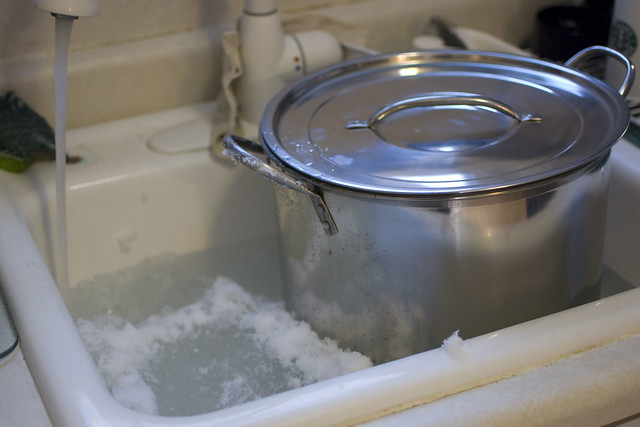
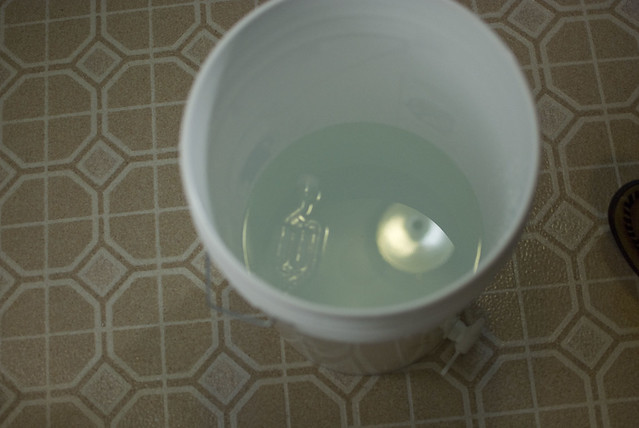
Now comes a VERY important part. Since we will no longer be heating up the beer (since boiling water sanitizes) it's VERY important to make sure no foreign bacteria gets in the beer... because it could effect the yeast and worst case scenario ruin the beer "OH NO". See brewing beer is much like a science experiment... we have to pay special attention to all that goes in. So we got our buck of sanitizing liquid ready and sanitized everything that was going to be going into the beer. Which is also why we didn't want ANY of the snow to fall into the beer. There could have been some crazy bacteria in that snow.
Wow our floors are ugly.
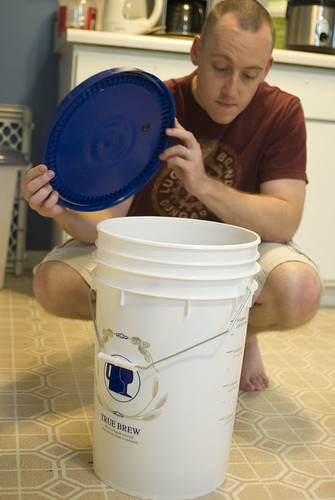
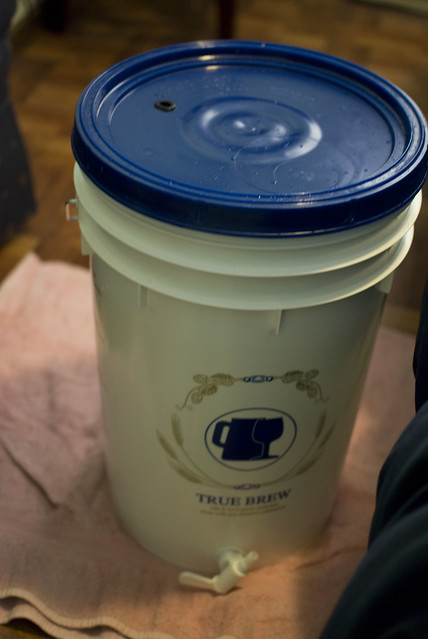
Once we got the beer cooled to about 70 degrees (I think that is what he said) we poured it in it's fermenting bucket.
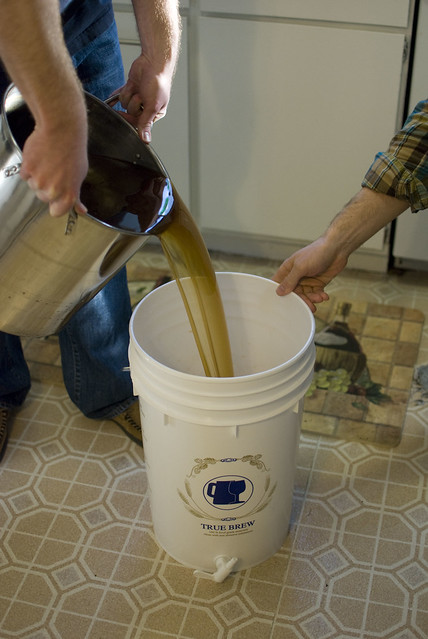
Yes this is the same bucket we had the sanitizer in. Because well we needed to sanitize the bucket as well. We emptied out the sanitizer, put a little off to the side in case any last minute sanitizing needed to be done. Then we tested the temperature again.
We also poured in the cold water to bring our batch back up to the 5 gallon mark. You might ask why we didn't sanitize this water... well Sam said they usually don't, they just use tap water and it seems to work just fine. So that's what we did too :-)
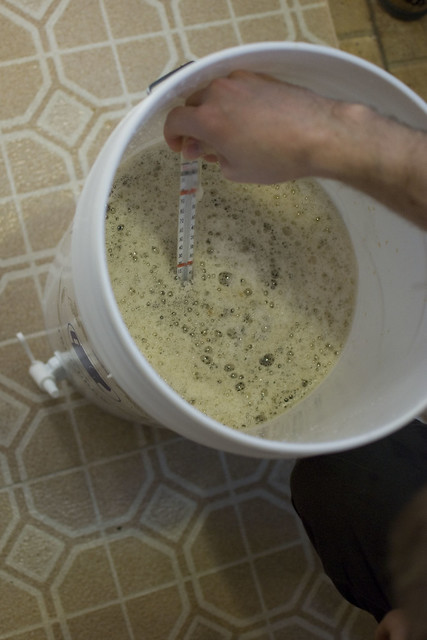
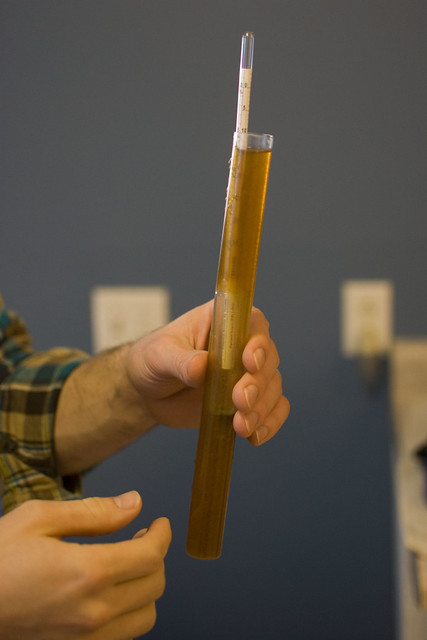
Next we measured the potential gravity with our hydrometer. And some other details I don't remember. (we weren't even drinking during this... that's just how BAD my memory is, heehee. Luckily Kyle's memory is GREAT so he makes up for where I lack)
 -
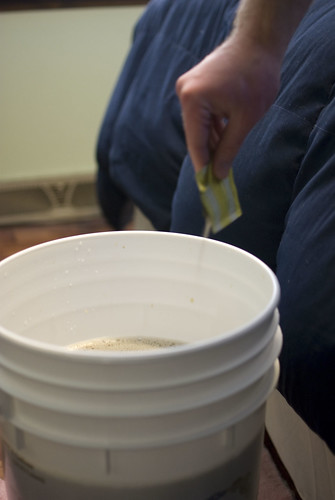
-Then we moved the beer to it's storing location, which happens to be in our spare bedroom. Now that the bucket was where it was to be for the next few weeks, it was time to add the yeast.
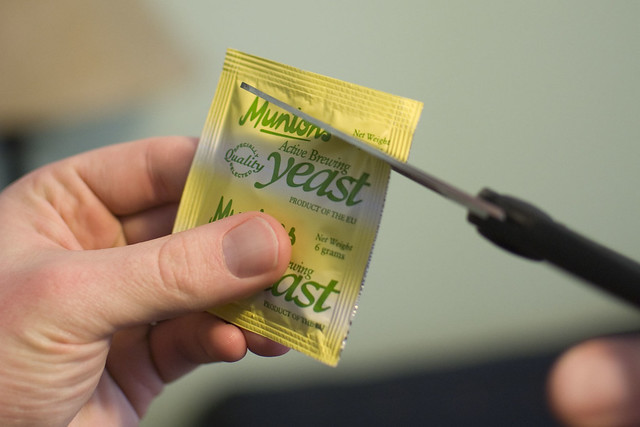
The yeast is the star player of this ordeal.
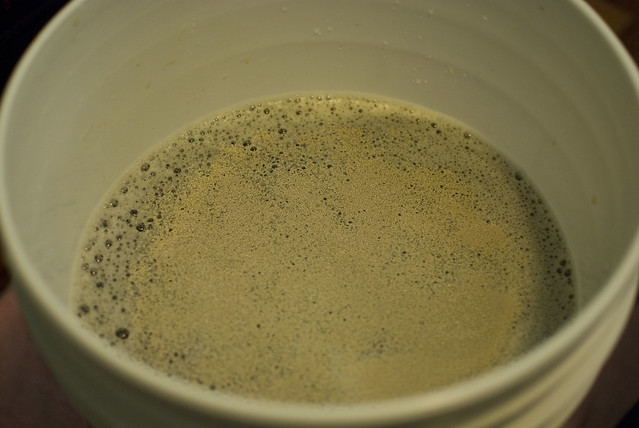
Since we just had a Copper Ale, which isn't as 'temper-mental' as the staff member of Midwest Supplies told us, it wasn't as important to have a pricey type of yeast, so we just used what the kit came with. (many times you can upgrade your yeast). Awww look at that yeast!
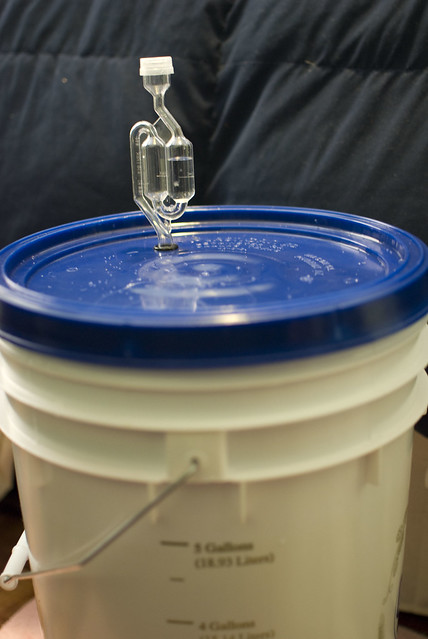
Then we put the lid on
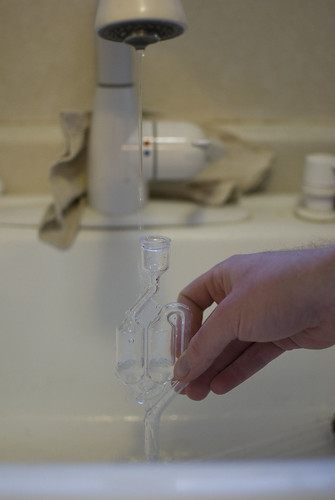
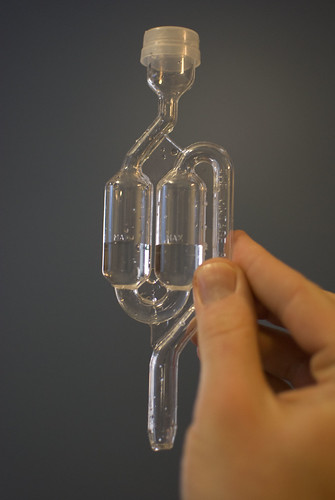
and got the air lock ready to put in the little hole you see on the top of the lid. We just filled the airlock with water up to the max fill line.
Pushed the airlock into the hole... and NOW we wait a few weeks.
There was a little complication with putting the airlock in, but I didn't feel it was important to document it. All is well now :-)
And that completes our ' How we Brew Beer ' blogging special, lol. Stay tuned for part 2 - the BOTTLING!
1 comment:
I'm thrilled that you and Kyle have joined the homebrewing masses - pretty cool, huh? This post makes me want to brew again (it's been a few months since we've used our gear.)
Fantastic pics as always. So cool to see such artistic shots of the process.
Post a Comment